
 Phase 1: Assessment and Design (The Plan)
This initial stage focuses on understanding the site’s limitations, defining your goals, and creating a detailed, functional blueprint.
| Step | Description | Key Action |
| 1. Site Analysis & Inventory | Conduct a thorough assessment of the existing yard. Map out the property boundaries, existing structures (house, driveway), and note all utilities (gas, water, electrical). Analyze environmental factors: sun/shade patterns, wind, topography, and existing drainage issues. | Determine where to plant and where to build structures based on site conditions. |
| 2. Define Needs & Goals | Determine how the space will be used (e.g., entertaining, children’s play, relaxation). Establish the aesthetic style and prioritize desired features (patio, walkways, fire pit, garden beds). Set a realistic budget. | Create a functional list of “wants” vs. “needs.” |
| 3. Conceptual Design | Create initial sketches, dividing the yard into functional “rooms” (e.g., public front yard, private backyard, service area). Outline traffic flow and the general scale of elements. | Develop a high-level layout showing placement of features. |
| 4. Final Design & Documentation | Develop the concept into detailed construction plans. This includes specific measurements, material specifications for hardscaping, and a comprehensive list of plants chosen for the local climate (hardiness zone). | Produce the final blueprint and plant schedule. |
| 5. Permits and Approvals | Secure necessary permits from local municipalities for any major work, such as changes to grading/drainage, high retaining walls, or utility connections (electrical, gas). | Obtain approval before any physical work begins. |
Phase 2: Site Preparation and Hardscape Construction
Physical work begins here, starting with the groundwork and all non-living structural elements (Hardscape). This phase must be completed before planting to prevent damage to softscaping.
| Step | Description | Order of Operation |
| 6. Demolition & Rough Grading | Remove old plants, debris, and existing structures that won’t be reused. Begin the initial shaping of the land to ensure water drains properly away from the house and towards designated drainage areas. Always call 811 to locate utility lines before digging. | Infrastructure First |
| 7. Utility and Drainage Installation | Install all underground systems: trenches for main irrigation lines, electrical conduit for lighting, gas lines for fire pits or grills, and subsurface drainage systems (e.g., French drains). | Underground Work |
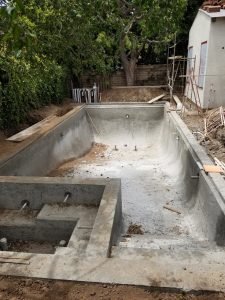
| 8. Hardscape Construction | Build all permanent, structural elements that define the landscape: pouring concrete foundations, building retaining walls, installing the base for patios and walkways (pavers or stone), and constructing decks or pergolas. | Structural Work |
| 9. Fine Grading & Soil Preparation | After hardscaping, apply the final layer of soil to achieve precise elevations. Test the soil and amend it (add compost, topsoil) to optimize drainage and nutrient conditions for future plant health. | Soil Foundation |
Phase 3: Softscaping and Finishing (The Final Touches)
This stage involves installing the living components and finishing the details.
| Step | Description | Focus |
| 10. Irrigation Installation | Install the final components of the watering system, including sprinkler heads, drip lines, and control boxes, ensuring all plants and lawn areas are properly covered. | Water Delivery |
| 11. Planting | Install the living elements in sequence: Trees (the largest elements), followed by large shrubs, then perennials and small groundcovers. This ensures the largest plants are placed without damaging smaller installations. | Living Elements |
| 12. Lawn Installation | Install the final turf—either by laying sod for an immediate lawn or by seeding/hydroseeding, which is more economical but requires more time to establish. | Ground Cover |
| 13. Final Details and Clean-up | Install landscape lighting fixtures. Apply a layer of mulch or decorative gravel to all planting beds for moisture retention, weed suppression, and visual finish. Remove all construction debris and clean the site. | Aesthetics & Maintenance |
| 14. Walkthrough and Maintenance | Conduct a final inspection with the contractor. Receive instructions on operating the irrigation system, proper watering schedules, and care guidelines for newly installed plants. |